Photo to SVG: How to Turn a Picture into a Vector File
Portraits, silhouettes and line art - which preset to pick, how to prep the shot, and which photos should stay raster. Free converter, no signup.
Photos Are the Hardest Input to Vectorize - Here's Why
A photo to SVG conversion is not a format swap - it is an interpretation. A photograph is continuous tone: thousands of intermediate colors, soft gradients, texture everywhere. A tracer has to decide which of those tones become actual shapes, and that decision is the whole skill of the job. If your photo is ready right now, the free online PNG to SVG converterdoes the conversion in under a minute; the rest of this guide is about making it come out the way you intended.
One scoping note first. Converting logos, screenshots and flat graphics is a different (easier) job, covered in the guide to converting any image to SVG. This article sticks to what is specific to photographs: silhouettes, line art, full-color traces, and the preparation that decides whether the result is usable.
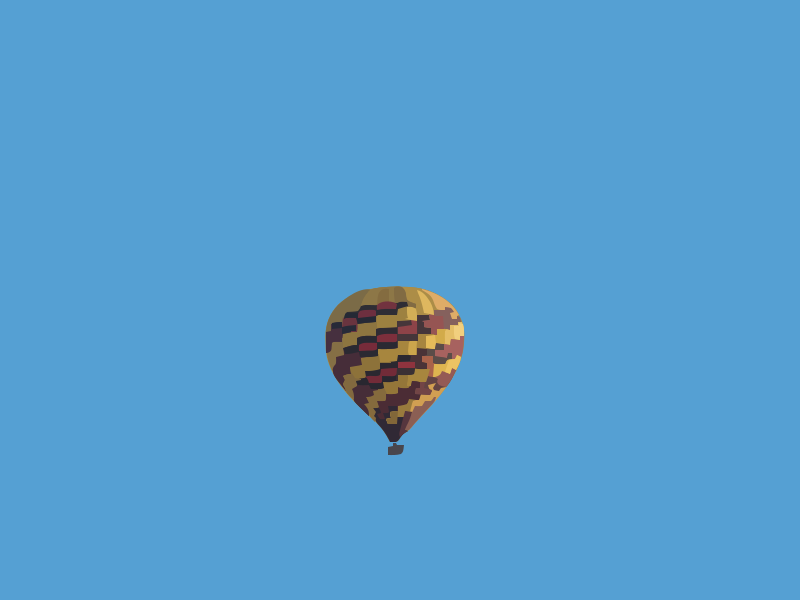
Know what you are asking for: a traced photo is not a photograph. The tracer rebuilds your picture as stacked flat color shapes - think poster art, not a replica - and it will never invent detail the camera did not capture. And if some "converter" hands you an .svg that still shows your exact photo, open it in a text editor: one giant base64 <image> tag instead of <path> elements means the file is your JPG in a costume, not a vector.
Real results from the converter
One Photo, Three Destinations: Silhouette, Line Art or Full Color
Before touching a single setting, decide what the SVG is for. Photos fail at conversion mostly because the person let the tool guess. There are three useful answers, and each maps to one preset.
Silhouette - the portrait cut file
The classic use: turn a profile portrait or a subject into one solid shape for vinyl cutting, laser engraving or a stencil. Use the Black & White preset on a photo where the subject reads clearly against the background - a side-lit face against a plain wall is the textbook case. Everything darker than the threshold becomes the shape; everything lighter disappears.
Line art - engravings and coloring pages
If the photo is of a drawing - ink lines on paper - you want the lines kept and the paper gone. The Black & White preset does exactly that, and the quality of the result depends almost entirely on the contrast of the original: dark, even lines on white paper trace into clean vector strokes.
Full color - posterized, not photographic
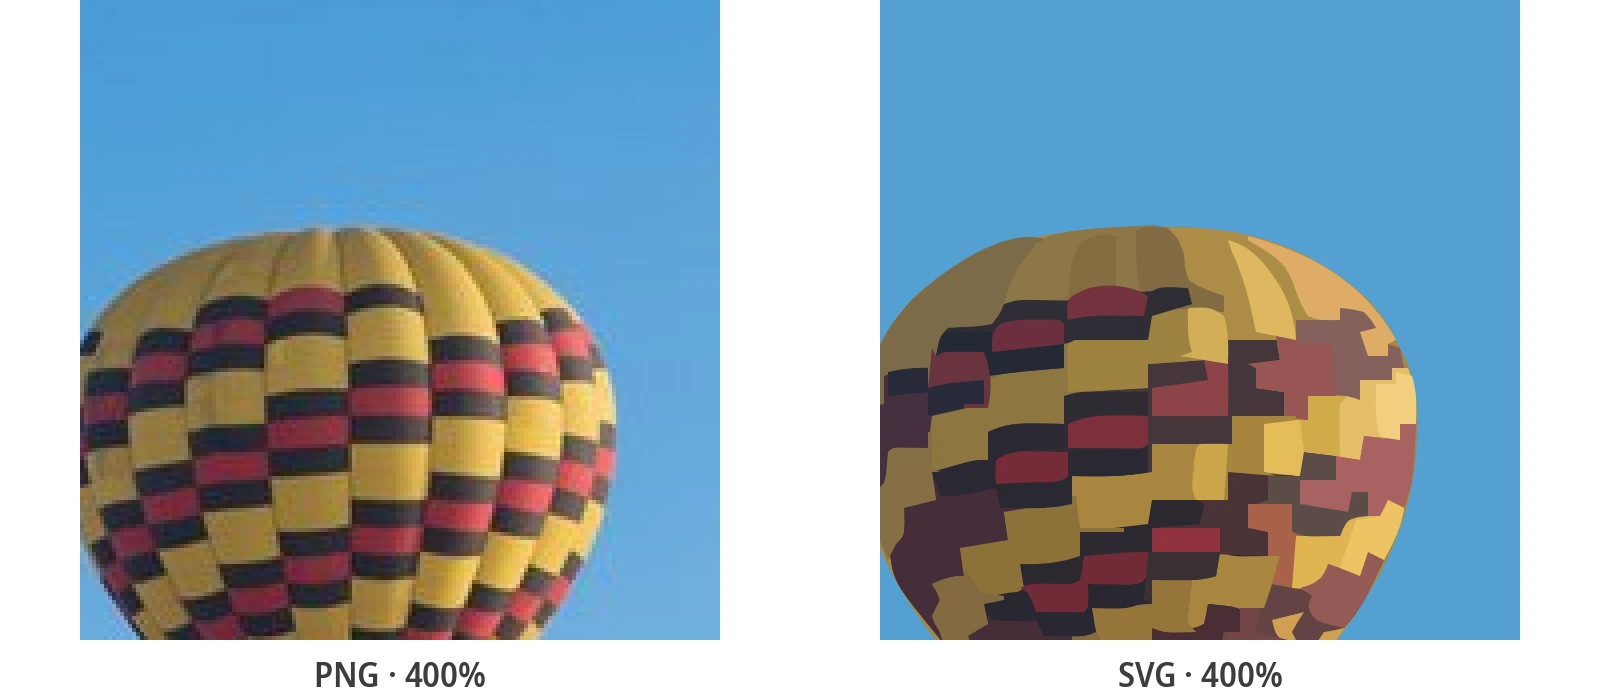
The Photo preset keeps gradients and shading by rebuilding them as layered color patches; Poster does the same for flat, stylized art with a limited palette. Expect a poster-style rendering of your photo - heavier than a logo trace, but it scales to a billboard without a single pixel.
Which Preset for Which Photo
The whole decision in one table - match your photo to the row, take the preset in the middle column.
| Your photo | Preset | What you get |
|---|---|---|
| Portrait or subject for a cut file, stencil or engraving | Black & White | One solid silhouette shape, machine-ready |
| Photo of a drawing: ink, pencil, signature | Black & White | Clean line work, paper removed |
| Flat, stylized art with a few solid colors | Poster | Each color region as an editable shape |
| Full-color memory shot, product with shading | Photo | Layered color patches, gradients approximated |
| Busy background, low light, heavy noise | Prep first | No preset fixes the shot - see the prep section below |
| Photo that must stay photorealistic | Stay raster | Keep the JPG - tracing deliberately posterizes |
Two presets exist for a reason: they encode completely different interpretations of the same pixels. If the first result disappoints, change the interpretation - not the tool. The mechanics behind the choice are explained in what vectorization actually does.
Before You Trace: 60 Seconds of Prep That Decides the Result
Tracing quality is decided before the upload. The tracer can only work with the shapes you give it, so spend one minute on the source photo:
- Crop tight. Make the subject fill the frame. Every pixel of background you keep is budget the tracer spends on something you did not want.
- Raise the contrast. For silhouettes and line art, the gap between subject and background is everything. Most photo editors' auto-contrast is enough.
- Simplify the background. A plain wall, sky or sheet turns a mediocre trace into a clean one. Busy backgrounds and subjects merge into mush.
- Use the largest original you have. More source pixels mean smoother reconstructed curves. A 200-pixel thumbnail will never trace well - that is a resolution problem no preset can fix.
One honest limit: the converter does not remove backgrounds. If you need the subject isolated on transparency, do that cutout in a photo editor first, then trace the result.
How to Convert a Photo to SVG for Free
No account, no install, no watermark - four steps:
- Upload the photo - drag and drop it in. JPG, PNG, WebP and BMP all work; straight-from-camera JPGs are fine.
- Pick the preset - Black & White for silhouettes and line art, Poster for flat-color art, Photo for full-color shots with gradients.
- Fine-tune - color count and path detail trade fidelity against file size, per photo.
- Download the SVG - real <path> elements, ready for the web, print or a cutting machine.
Under the hood, the conversion runs an auto-tracing engine derived from VTracer, the open-source Rust tracer: your photo is rebuilt as layered vector shapes, never wrapped or renamed.
Which Photos Trace Well - and Which Never Will
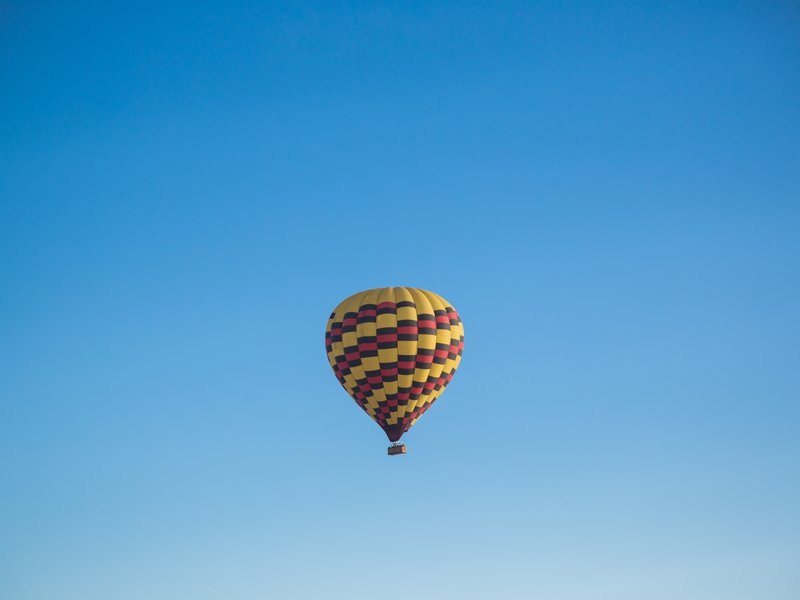
Set expectations before spending an hour on a photo that cannot work. Photos that trace well share three traits: a subject clearly separated from its background, flat or directional lighting, and edges the eye can follow - buildings, products, a balloon in a blue sky, a face in profile against a wall.
- Traces well: high subject-background contrast, distinct edges, flat lighting, already-stylized art, bold graphics on plain backgrounds.
- Never traces well: subjects melting into busy backgrounds, fine texture everywhere (hair, fur, foliage), low-light noise, tiny thumbnails.
- Should stay raster: anything whose value is being a photograph. A wedding shot that must look like a wedding shot is a JPG job - the trade-offs are laid out in SVG vs PNG.
More pixels will not rescue a photo with no clean shapes in it. Recovering detail that was never captured is an upscaler's job - a different category of tool, deliberately not what this one does.
Photo Traced Badly? Fix Blobby, Muddy or Speckled Results
Every failed photo trace is one of three symptoms, and each has a known fix:
- Muddy mid-tones - too many similar colors fighting each other. Lower the color count so the tracer commits to fewer, cleaner patches.
- Blobby shapes - the tracer simplified too much. Raise the detail level, or feed it a larger source crop of just the problem area.
- Speckles and confetti - noise and background texture being traced as tiny shapes. Clean the background in the source photo first; that is cheaper than any settings battle.
The pattern behind all three: the preset interprets, the source decides. When a trace resists every setting, the photo is telling you which of the two to change.
Where a Photo SVG Actually Pays Off
Four destinations repay the conversion the moment the file lands:
- Cutting machines - a traced silhouette is exactly what Cricut and Silhouette consume; the guide to SVG files for Cricut and laser cuttingtakes over from there.
- Laser engraving - engravers follow vector paths, not pixels; a clean B&W trace of the subject is the input they ask for.
- Large-format print - a poster, banner or vehicle wrap scales from one traced file with zero pixelation.
- Poster-style web art - the posterized look is a legitimate design choice, and as an SVG it weighs less than the photo it replaced at billboard size.
Working a whole set - wedding portraits, Etsy listings, a product catalog? That is a batch job: the batch conversion guide covers running dozens of photos through one consistent settings profile.
Related Conversion Guides
Generic conversion, cutting machines and vector theory - the deep dives.
Frequently Asked Questions
How do I convert a photo to SVG for free?
Upload the photo to the free online converter, pick a preset (Black & White for silhouettes and line art, Photo for full color), and download the SVG - no account, no watermark. If you work offline, the free desktop app does the same conversion locally.
What kind of photo converts best to SVG?
Photos with a clearly separated subject, strong contrast against a plain background, and distinct edges - portraits in profile, products, buildings, drawings. Busy backgrounds, fine texture everywhere and low-light shots trace poorly no matter the settings.
Can I cut a photo SVG on a Cricut or engrave it with a laser?
Yes - that is the most common reason to convert. Trace the photo with the Black & White preset to get a solid silhouette, and the resulting paths are exactly what cutting machines and laser engravers follow.
Why does my photo look cartoonish after conversion?
Because tracing rebuilds the photo as flat stacked color shapes - a poster-style interpretation, not a replica. Raising the color count or detail level gets closer to the original; if you need true photorealism, keep the photo as JPG or PNG.
Is converting a photo to SVG the same as upscaling it?
No. Upscaling enlarges the existing pixels; tracing replaces pixels with geometric shapes that scale infinitely but deliberately simplify the image. Tracing will not recover detail the camera never captured - it makes what is there resizable and machine-cuttable.
Turn Your Photo into an SVG Now - It's Free
Upload a photo, pick a preset, download a real vector SVG in under a minute - no account, no watermark, no strings.
Support Open Source Development
PixelToPath is free to use. If this tool helped you save time, consider buying me a coffee.
❤️ Donate on Ko-fi